While Google Analytics provides you with a lot of valuable data on your visitors, Google Tag Manager takes your conversion rate optimization strategy to a new level by allowing you to track specific conversion events. You’d think Google Tag Manager’s higher level of functionality would mean you’d also need a higher level of technical know-how, but that’s not the case. The great thing about Google Tag Manager is that you don’t need the expertise of a developer to make changes to what you’re tracking. In fact, the powerful conversion tracking platform is specifically designed to be used by website owners and marketers.
In this piece, we’ll show you the step-by-step process for (1) creating your Google Tag Manager account, and (2) linking your Google Tag Manager and Google Analytics accounts together with an ‘All Pages’ tag.
How to set up your Google Tag Manager account
If you don’t already have a Google Tag Manager account set up, you’ll be happy to know that it’s a fairly straightforward process if you already have a Google account. Simply go to tagmanager.google.com. Your screen should look like this:
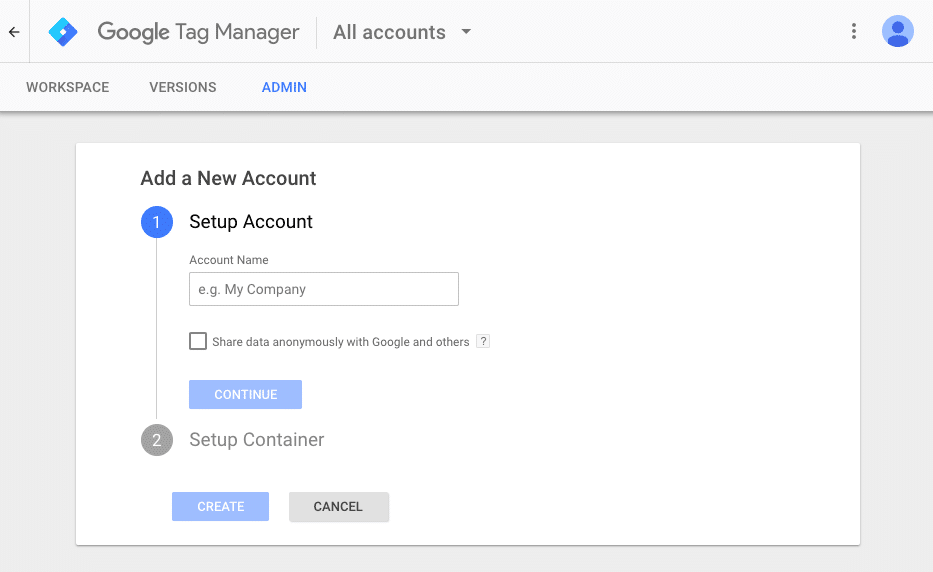
Name your account and hit “Continue.”
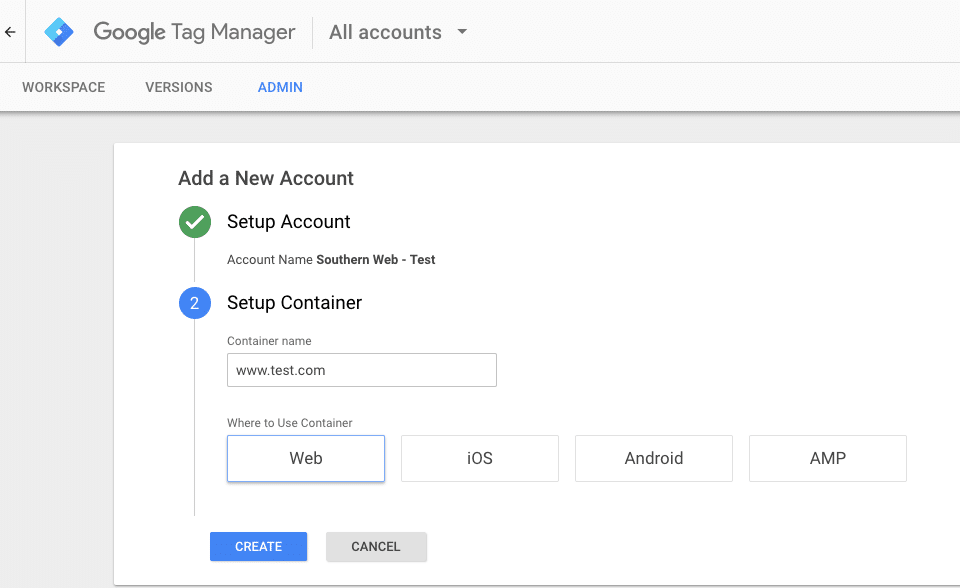
Next, add your site URL as the container name, and select where your container will be used. Then click “Create.”
You will then be shown a service agreement. Give it a read and then click “Yes” to continue.

You will then be navigated to a page like the one below, where you will be instructed to embed two distinct codes within every page of your site:
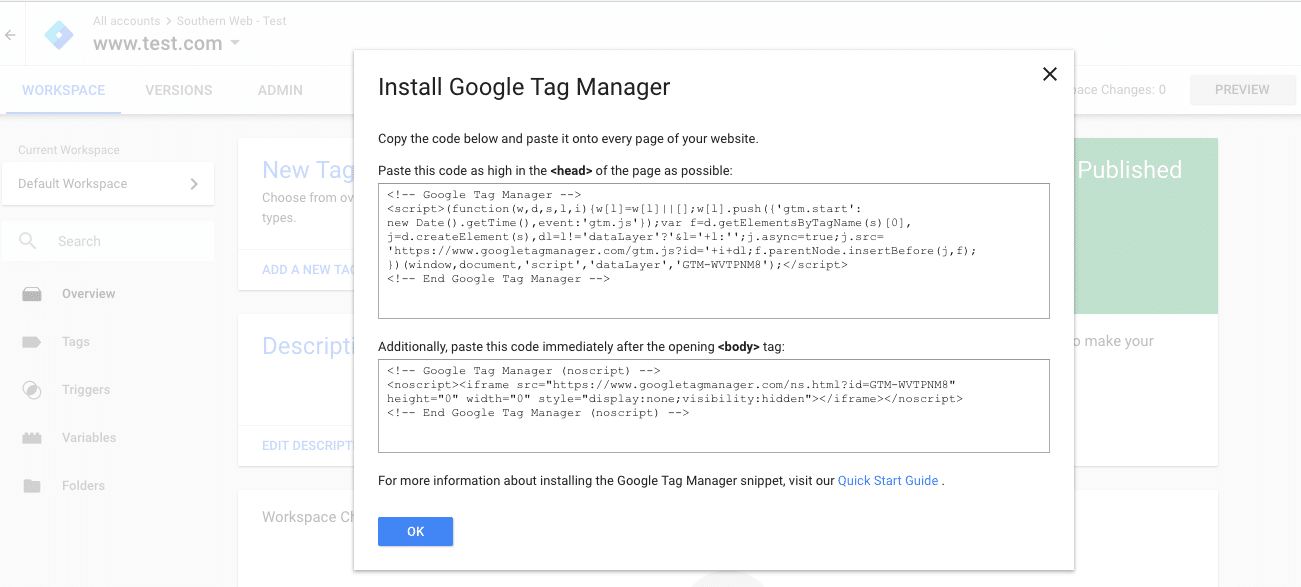
This container code is what holds all the tags you will be using to track conversions and other on-page activities. These tags should serve a specific purpose and have a designated “trigger” — such as a tag that tracks form submissions or digital downloads.
How to Set Up Commonly Used Variables in Google Tag Manager
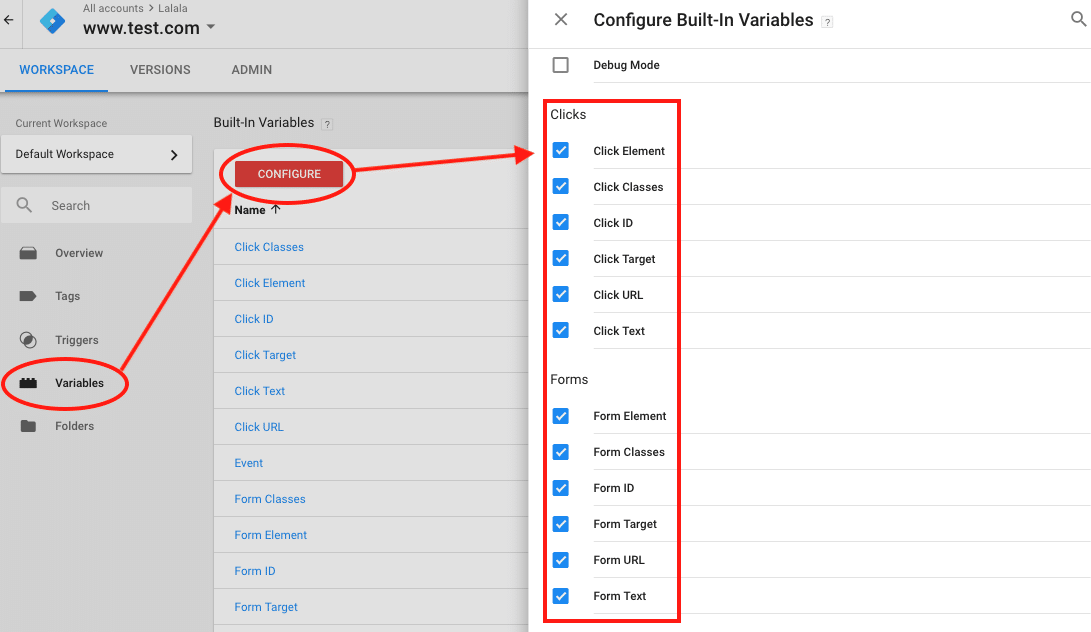
If you plan to set up certain conversion tracking measures, you’ll want to make sure you have certain variables set up. Starting at your dashboard, click on “Variables” in the left menu bar. Click on “Configure” and a menu of variables will pop up. We recommend having the the most common variables checked:
How to Set Up an ‘All Pages’ Tag in Google Tag Manager
Once you’ve set up your Google Tag Manager account and embedded the container code on your site (using our instructions above), click “OK” and this is what your page will look like:
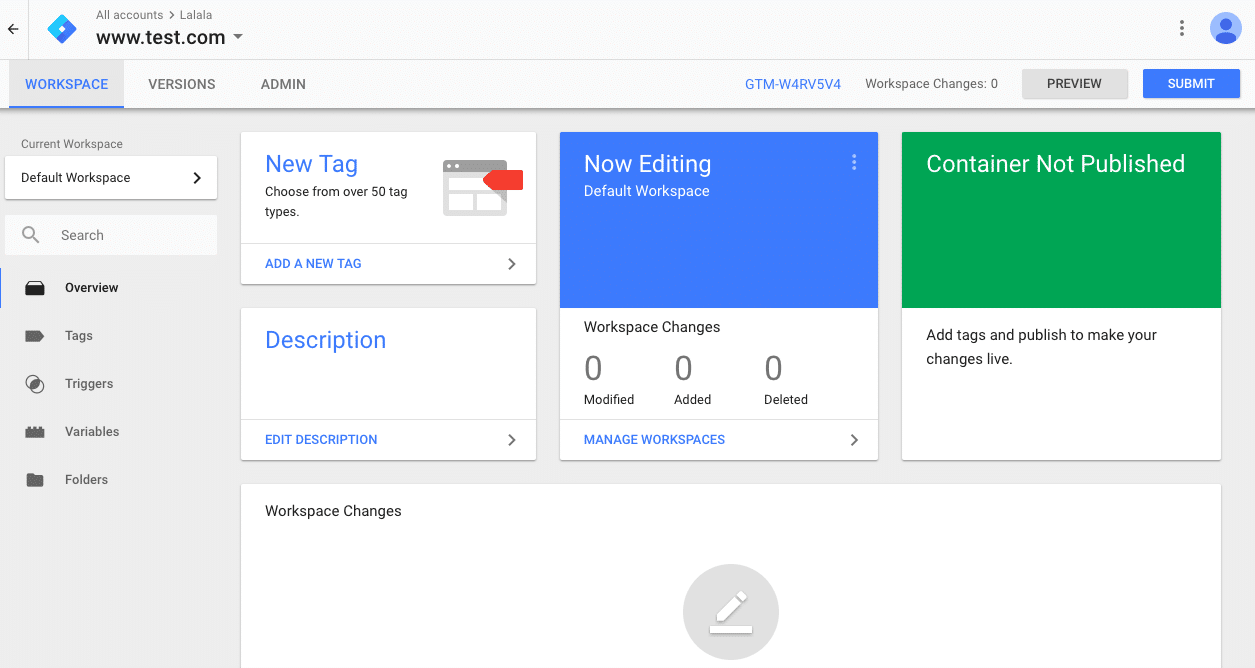
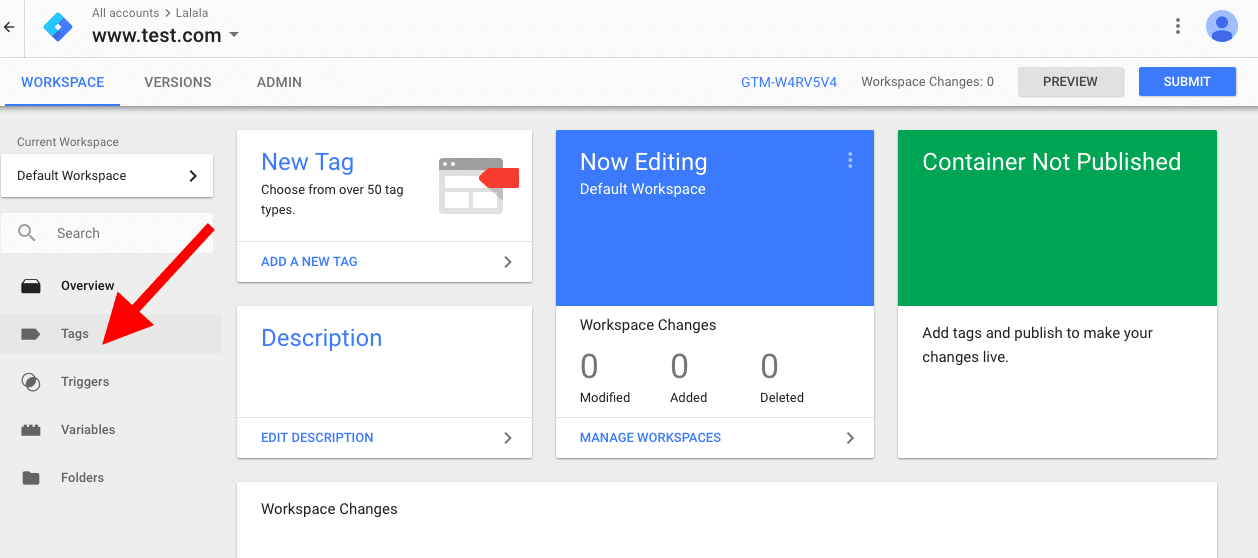
The next step is to connect your Google Tag Manager account with the appropriate Google Analytics account. You do this by setting up an “All pages” tag within your Google Tag Manager account. To do this, click on “Tags” in the left sidebar:
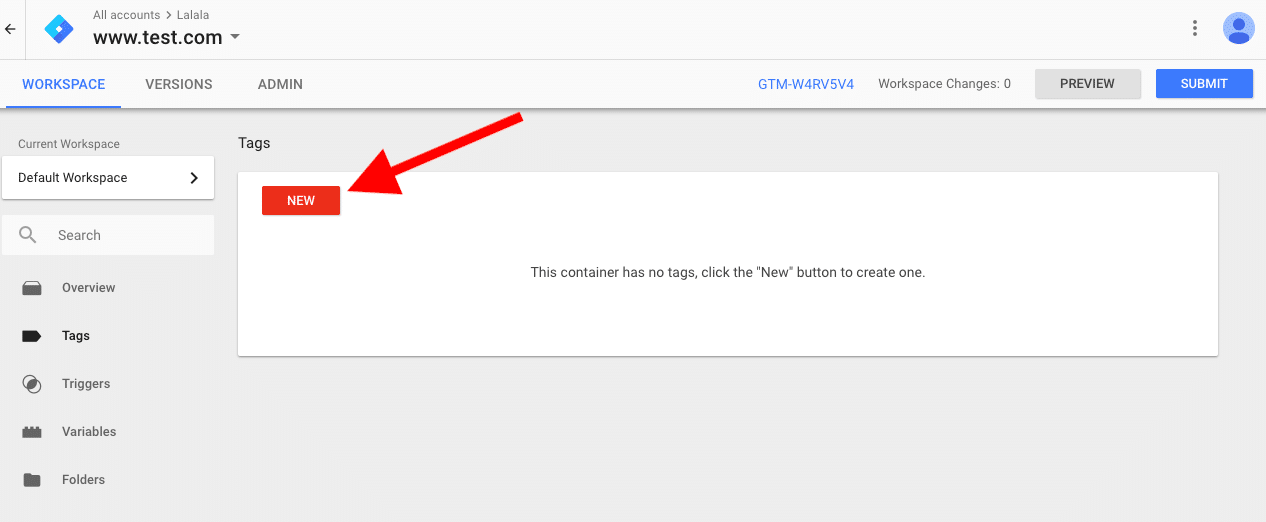
On the next page, click “New” to create your first tag.
You will be presented with a popup window that looks like this:
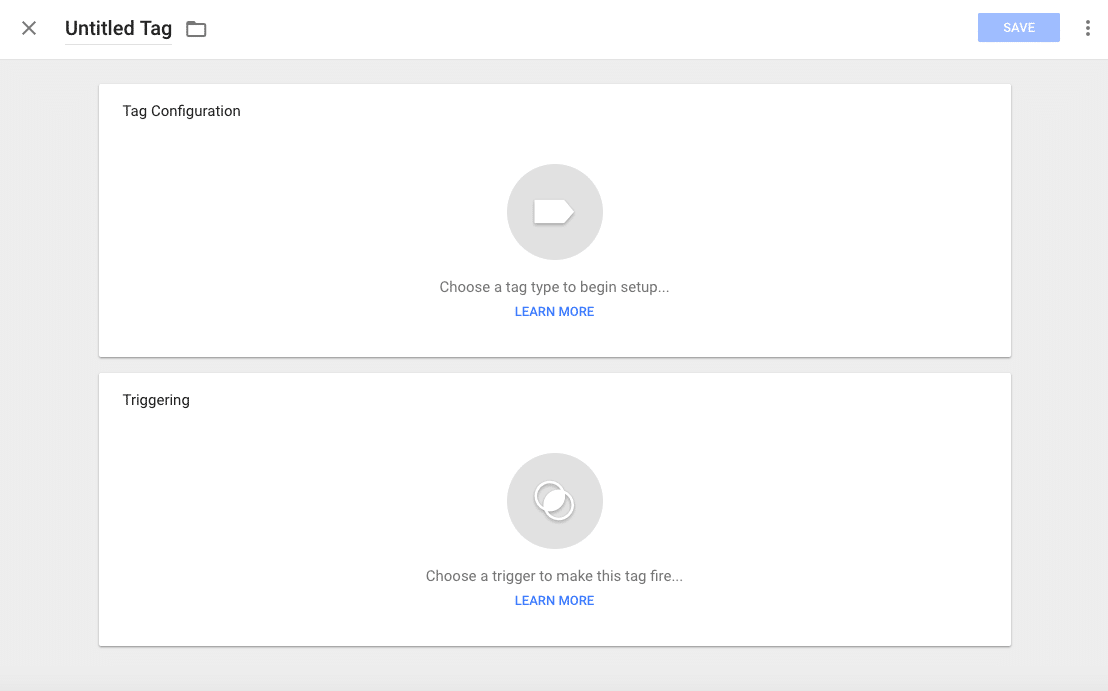
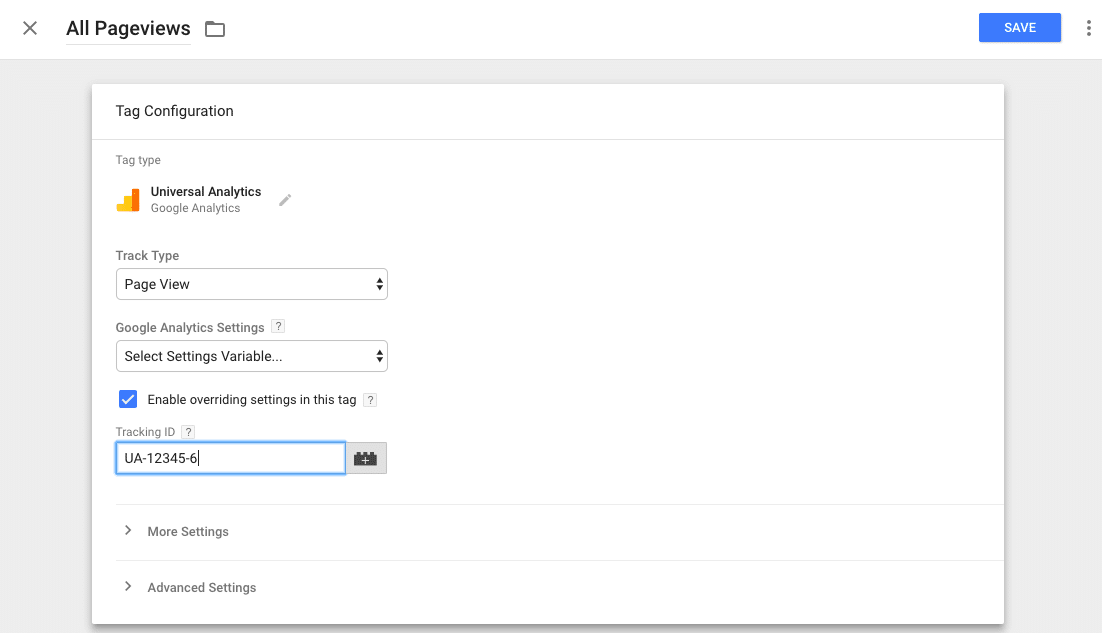
Since the tag is currently labeled as “Untitled tag,” change the name of the tag for easier identification later. For our purposes, we are naming it “All Pageviews.” Next, you’ll click on “Choose a tag type to begin setup…”
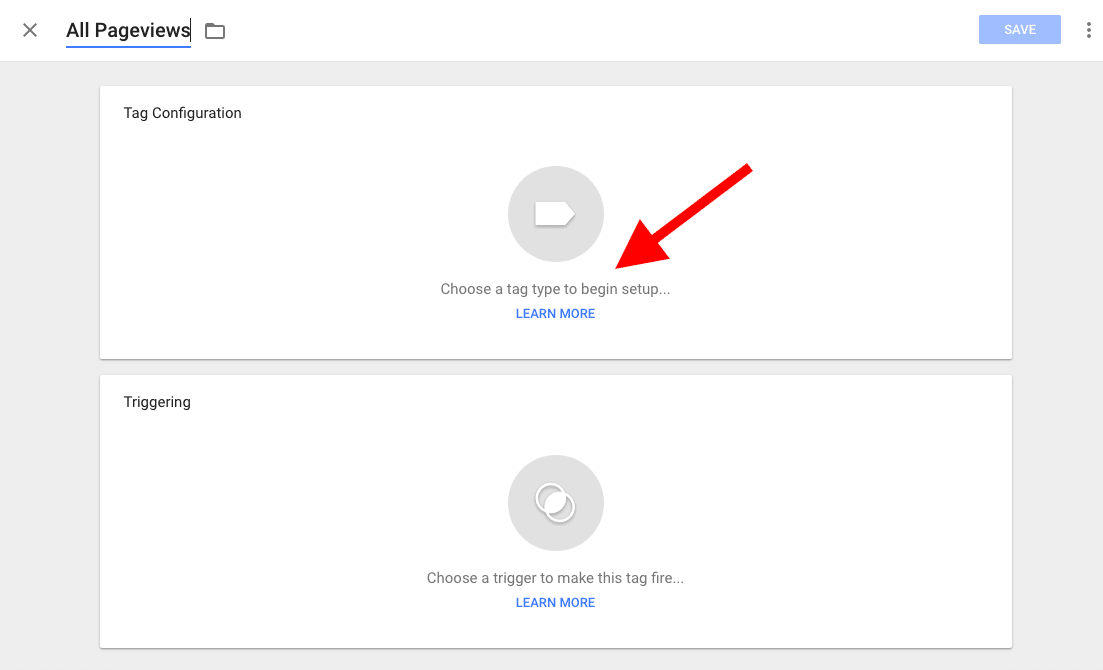
Select “Universal Analytics” — this is how we will connect your Google Analytics account to Google Tag Manager.
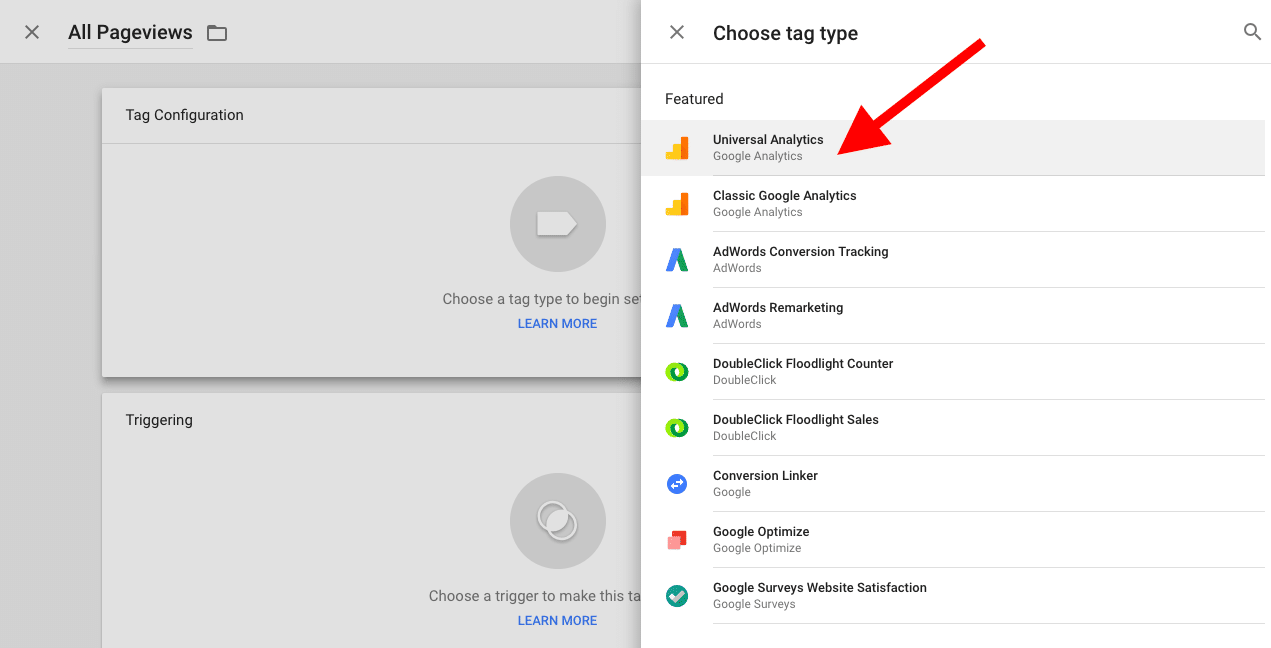
Below is what your screen should look like after clicking on “Universal Analytics.”
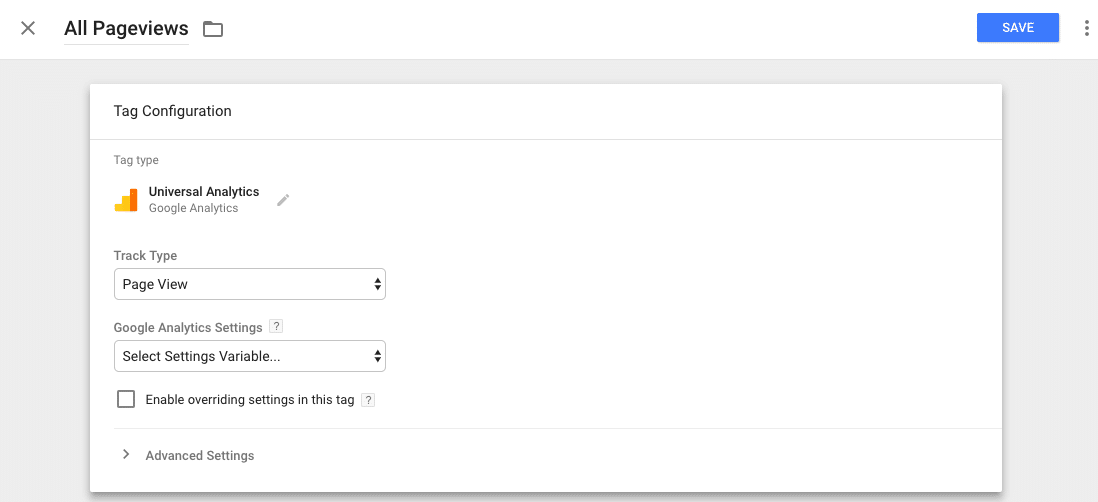
Click on “Enable overriding settings in this tag” to bring up a “Tracking ID” field.
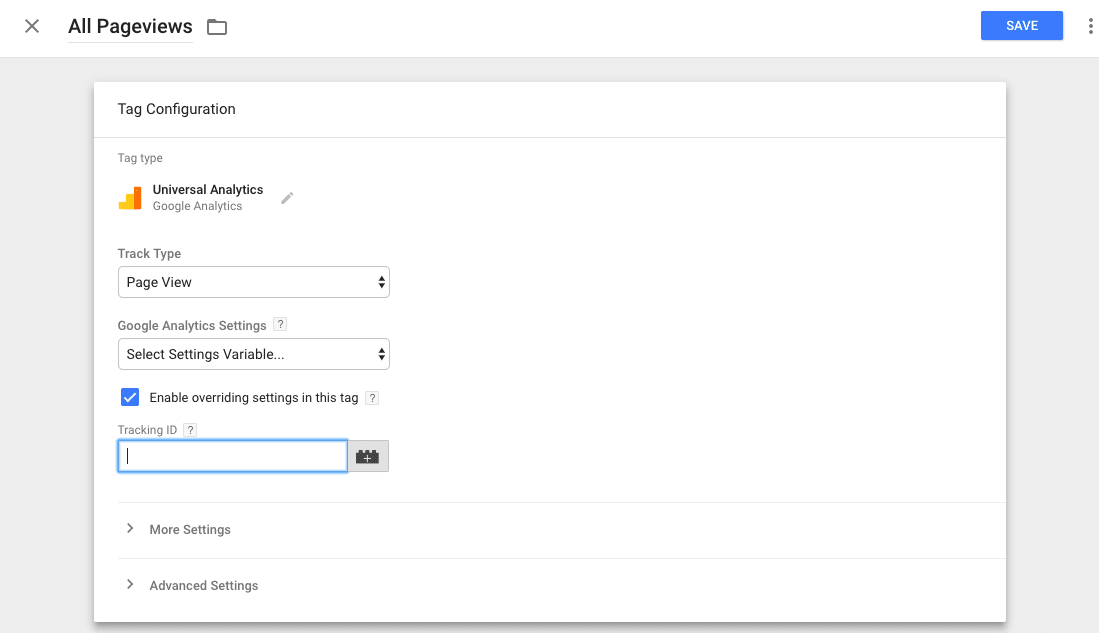
Input your Google Analytics Tracking ID into that field.
Next, click on “Choose a trigger to make this tag fire…” in the Triggering box:

A window will popup that allows you to choose a trigger. The only one that should be available to you at this time is the “All Pages” trigger you just created. Select it.

Your Tag Configuration and Triggering boxes should now look like this:
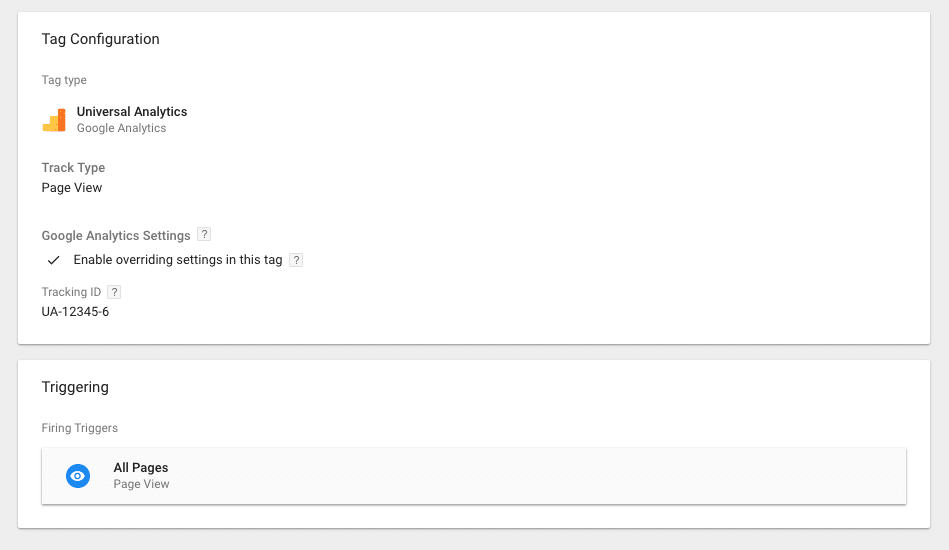
Once you’ve satisfied with your tag, there’s a multistep process to push it live. First, click “Save” in the upper right-hand corner. You will be brought to the main Tags dashboard. Click on “Submit” to continue the process:
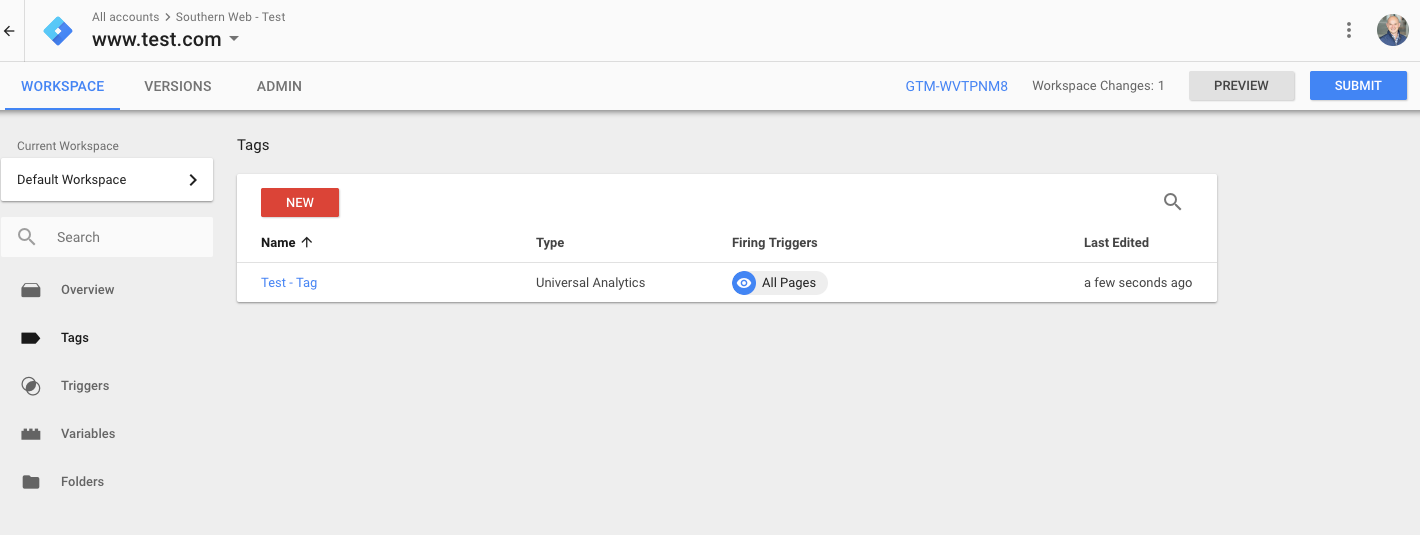
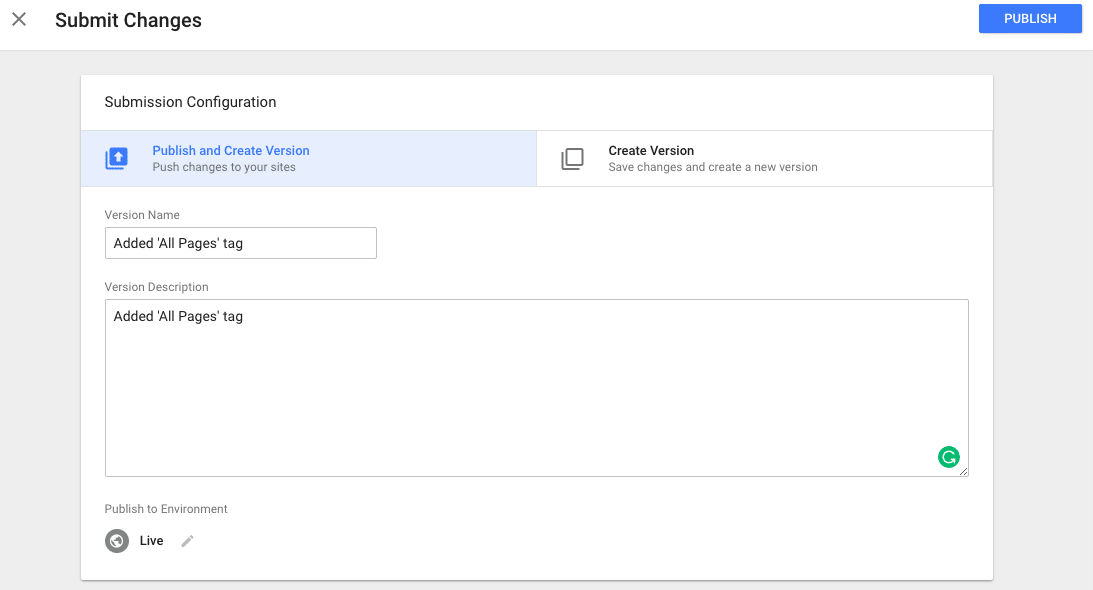
You will be brought to a screen that looks like this:
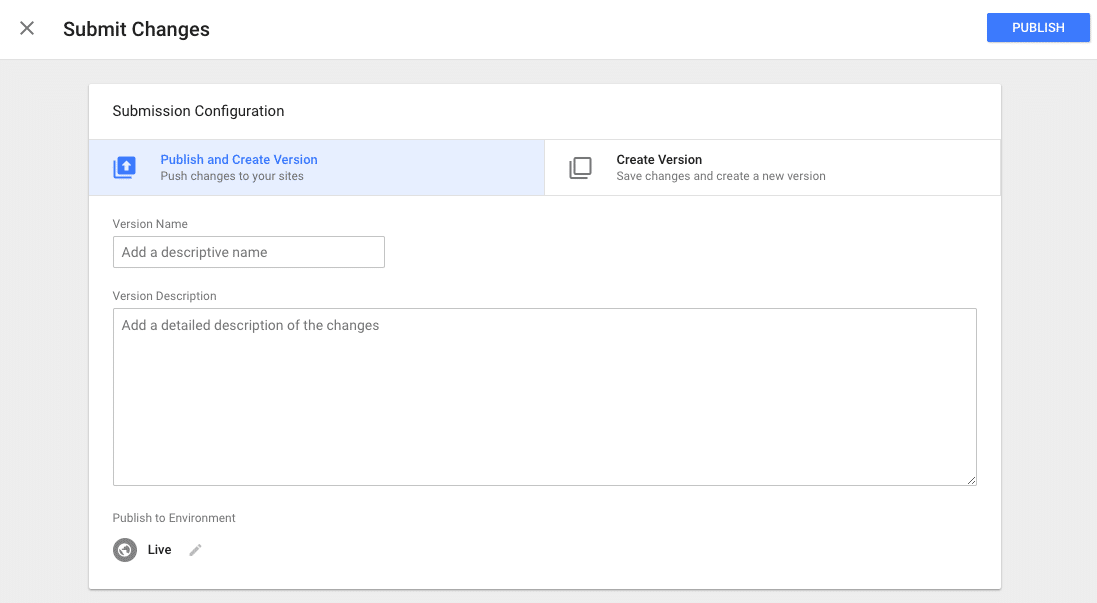
This page allows you to document the changes you’ve made to your tags. Simply explain what you’ve done in this version. In this case, just write “Added ‘All Pages’ tag” in the name and description, then click on “Publish.”
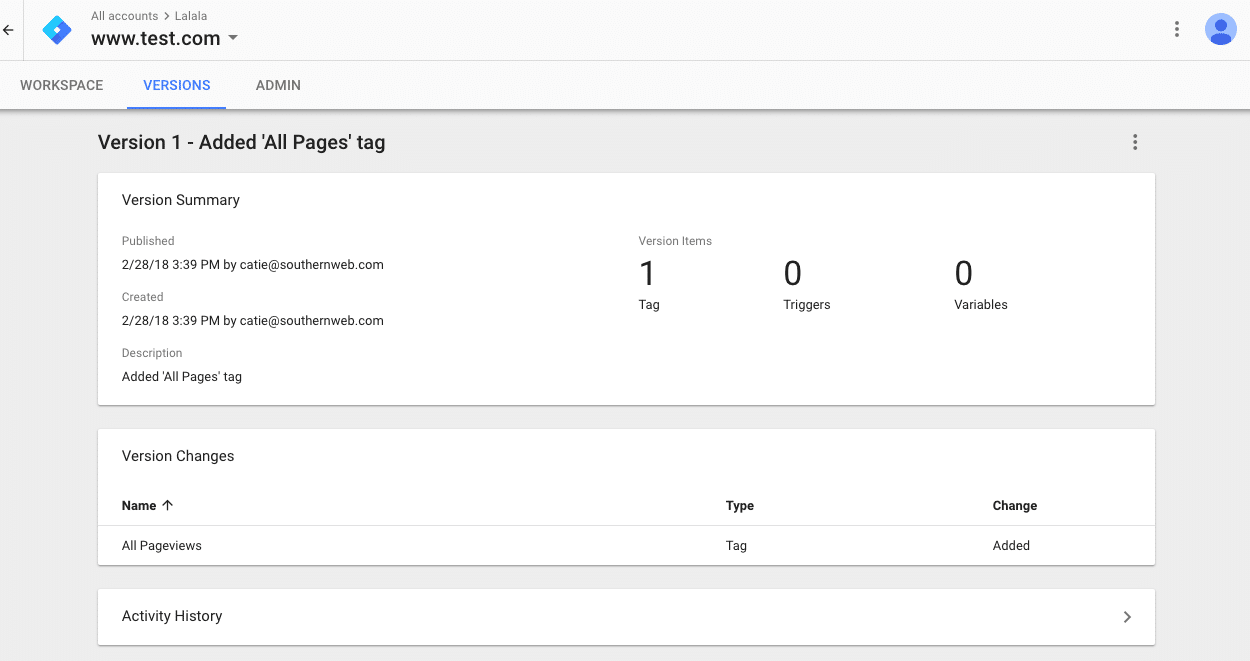
The next page will give you a brief rundown of information about your new tag version:
Congrats! With that “All Pages” tag in place, you’re now ready to move on to conversion tracking.


